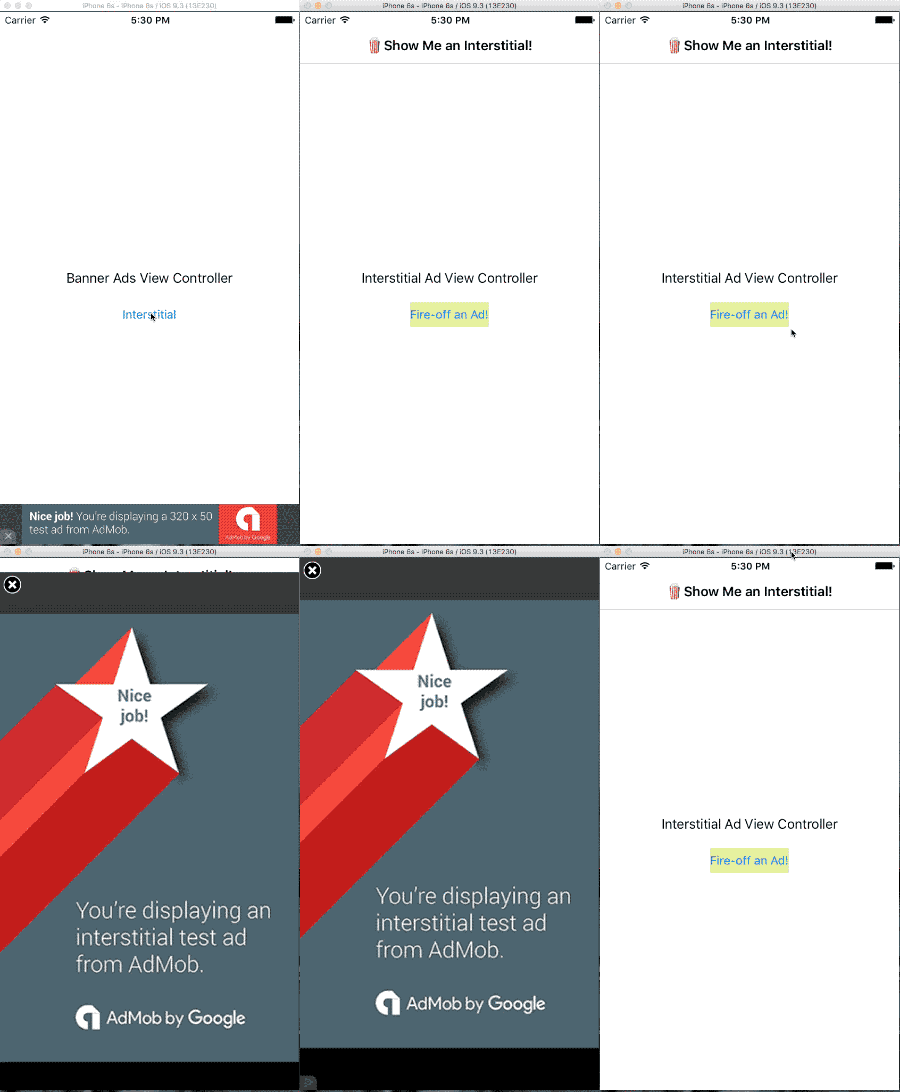
AdMob Demo App
With iAd shutting down at the end of June, I thought this is a perfect time to start learning Google’s AdMob. It was sad to see the shuttering of iAd because it was so easy to implement, track and stay-on-top-of all right there in one place. AdMob is the obvious replacement, but I was a little concerned about the amount of time it would take to get up and running. Here’s what I ended up with after just a few minutes of research and coding, it was much easier than I expected.

I simply followed the AdMob for iOS recipe and only made a few minor tweaks. The documentation is straight-forward and they’ve got a nice example if you want to take a peek at how Google implements it. I started off by adding a constant to use for my ID string, it saved me about two seconds, but I don’t have to look at that ugly thing in my code.
let googleAdTestID: String = "ca-app-pub-3940256099942544/2934735716"
Banner Ad
You’ll have to add the Google Mobile Ads SDK to your project using CocoaPods or by manual download. Google recommends CocoaPods, which will save you time both during initial installation and when updates are needed.
import UIKit
import GoogleMobileAds

class BannerAdsViewController: UIViewController {

    @IBOutlet weak var bannerView: GADBannerView!

    override func viewDidLoad() {
        super.viewDidLoad()

        print("Google Mobile Ads SDK version: " + GADRequest.sdkVersion() )

        bannerView.adUnitID = googleAdTestID
        bannerView.rootViewController = self
        bannerView.loadRequest(GADRequest())
    }
  }
I set up the bannerView on a storyboard using the autolayout pins and recommended sizes for banner ads. Next I control dragged for the @IBOutlet connection and entered the code above. Use Google’s sample adUnitID for your bannerView until you’re ready to go live.
You should also be aware of the App Transport Security privacy feature of iOS 9, it could effect the ads being served and its easily resolved with iOS 9 Considerations.
Interstitial Ad
import UIKit
import GoogleMobileAds

class InterstitialViewController: UIViewController {

    var interstitial: GADInterstitial!

    override func viewDidLoad() {
      super.viewDidLoad()
      self.interstitial = GADInterstitial(adUnitID: googleAdTestID)

      let request = GADRequest()
      request.testDevices = [ kGADSimulatorID ]
      self.interstitial.loadRequest(request)

      print("Google Mobile Ads SDK version: " + GADRequest.sdkVersion() )
}

  @IBAction func adButtonTapped(sender: UIButton) {

     print("button tapped")
      if self.interstitial.isReady {
          self.interstitial.presentFromRootViewController(self)
      }
  }   }
There are a couple things that could trip you up here, but it’s really pretty simple.
When you first run the interstitial nothing will show up, but you’ll see the something like the following in your console…
To get test ads on this device, call: request.testDevices = @[ kGADSimulatorID ];
This tells you the code you’ll need to include to in the request.testDevices line of code. For Swift we don’t use the @ or the ; at the end.
You should also know… this will only load one interstitial, if you want more you’ll have to request another or more. It’s not difficult and covered in the documentation.
This should get you up and running, but there’s a lot more you could/should do in terms of customization. Depending on your monetization strategy, you can check into the following.
- Native Ads
- Mediation - Serve ads from multiple sources.
- Rewarded Video - Chartboost recommends video ads.
- Targeting
Read more: